

Hey there! As a supplier of Injection Preform Mold, I know how crucial it is to measure the dimensions of an injection preform mold accurately. In this blog, I'll share some tips and techniques on how to do just that.
First off, why is accurate measurement so important? Well, an injection preform mold is used to create preforms, which are then blown into the final plastic containers. If the mold dimensions are off even by a tiny bit, it can lead to preforms that don't fit properly in the blow - molding machine, or the final containers may have defects like uneven walls, incorrect shape, or poor functionality.
Let's start with the tools you'll need. One of the most basic but essential tools is a caliper. There are two main types: vernier calipers and digital calipers. Vernier calipers are more traditional and rely on a sliding scale to measure. They're pretty reliable but can be a bit tricky to read accurately, especially for beginners. Digital calipers, on the other hand, give you a direct digital readout, which is super convenient and usually more accurate. You can measure the outer diameter, inner diameter, and depth of different parts of the mold with a caliper.
Another important tool is a micrometer. Micrometers are even more precise than calipers and are great for measuring very small dimensions. For example, when you need to measure the thickness of a mold wall or the diameter of a small pin inside the mold, a micrometer is your go - to tool.
For larger dimensions of the mold, like the overall length, width, and height, a measuring tape can be used. Make sure to use a good - quality, flexible measuring tape that can accurately follow the contours of the mold.
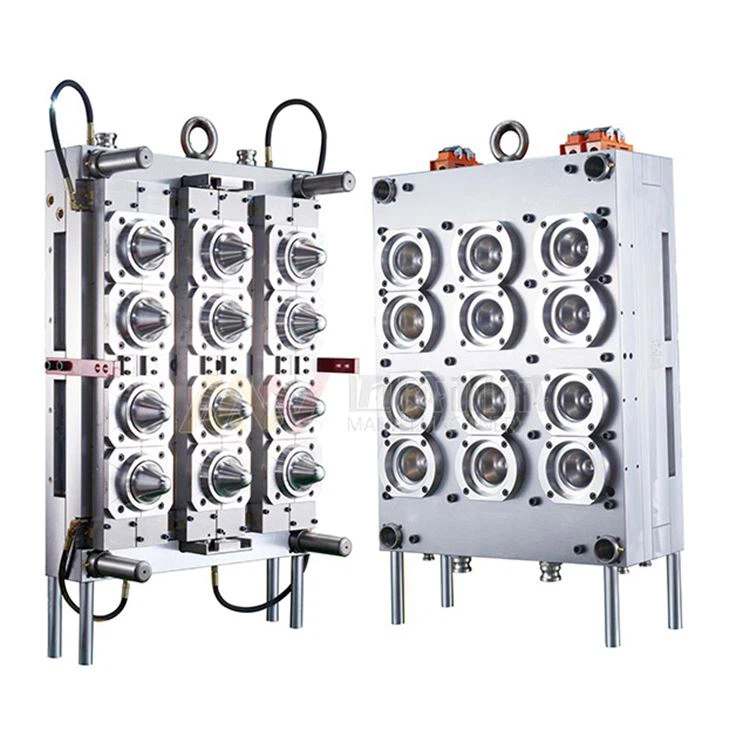

Now, let's talk about the actual measurement process. When you start measuring, it's a good idea to clean the mold thoroughly first. Any dirt, debris, or residual plastic on the mold can affect the measurement accuracy.
Begin by measuring the overall dimensions of the mold. Place the measuring tape along the longest side of the mold to get the length, then the next longest for the width, and the vertical side for the height. Record these measurements carefully.
When using a caliper or micrometer, make sure to zero them out before each measurement. For example, if you're using a digital caliper, press the zero button when the jaws are closed. This ensures that any measurement you take is relative to zero and not affected by any offset in the tool.
Measure the key features of the mold, such as the cavities. The cavities are where the preforms are formed, so their dimensions are critical. Measure the diameter of the cavity at the top, middle, and bottom. This can help you detect if there are any tapers or irregularities in the cavity. You can also measure the depth of the cavity using the depth - measuring function on the caliper.
If your mold has inserts, measure their dimensions separately. Inserts can be used to create specific features on the preform, like threads or handles. Make sure to measure the outer and inner diameters, as well as the length of the inserts.
Don't forget to measure the parting line of the mold. The parting line is where the two halves of the mold meet. A proper measurement of the parting line can help ensure that the mold closes correctly and that there are no flash (excess plastic) on the preforms.
It's also a good practice to take multiple measurements of each dimension. This helps to account for any small variations in the measurement process. For example, measure the diameter of a cavity three times at the same location and then take the average of those measurements. This will give you a more accurate result.
When measuring a Wide Mouth Preform Mold, you'll need to pay special attention to the wider opening. Measure the diameter of the wide mouth accurately, as well as the transition area from the wide mouth to the body of the preform.
For a Valve Gate Preform Mold, the valve gate area is crucial. Measure the diameter of the valve gate opening, the length of the valve pin, and the distance between the valve gates. These dimensions can affect the flow of plastic into the mold and the quality of the preforms.
Once you've taken all the measurements, record them in a detailed report. Include the date of measurement, the name of the person who took the measurements, and any notes about the mold, such as any visible wear or damage. This report can be used for quality control purposes and for future reference.
In addition to using physical measurement tools, you can also use 3D scanning technology. 3D scanners can quickly and accurately capture the entire shape and dimensions of the mold. The data from the 3D scan can be used to create a digital model of the mold, which can be analyzed in detail. This technology is especially useful for complex - shaped molds or when you need to compare the actual mold dimensions with the design specifications.
Accurately measuring the dimensions of an injection preform mold is a multi - step process that requires the right tools, careful technique, and attention to detail. By following these tips, you can ensure that your molds meet the required specifications and produce high - quality preforms.
If you're in the market for high - quality injection preform molds or need more advice on mold measurement and quality control, don't hesitate to reach out. We're here to help you with all your injection preform mold needs. Whether you're looking for a Wide Mouth Preform Mold, a Valve Gate Preform Mold, or a standard Injection Preform Mold, we've got you covered. Contact us today to start a great business partnership!
References
- "Mold Design and Manufacturing Handbook"
- "Plastic Injection Molding Technology"


